Easy Woodland Hooded Scarf Crochet Free Pattern Tutorial
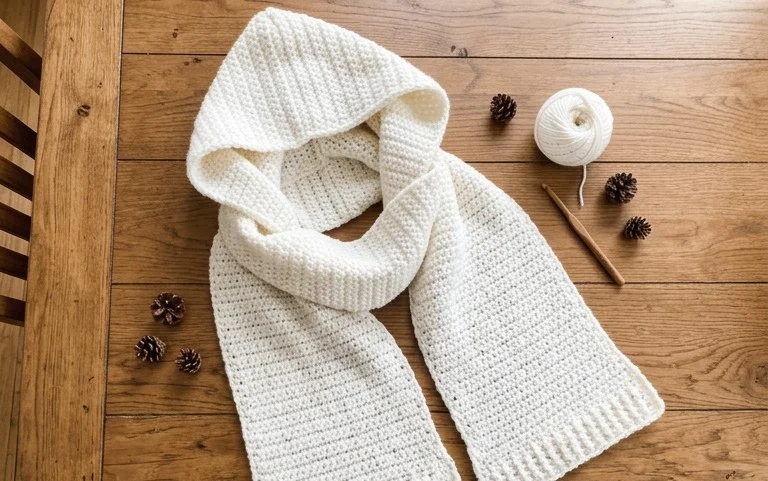
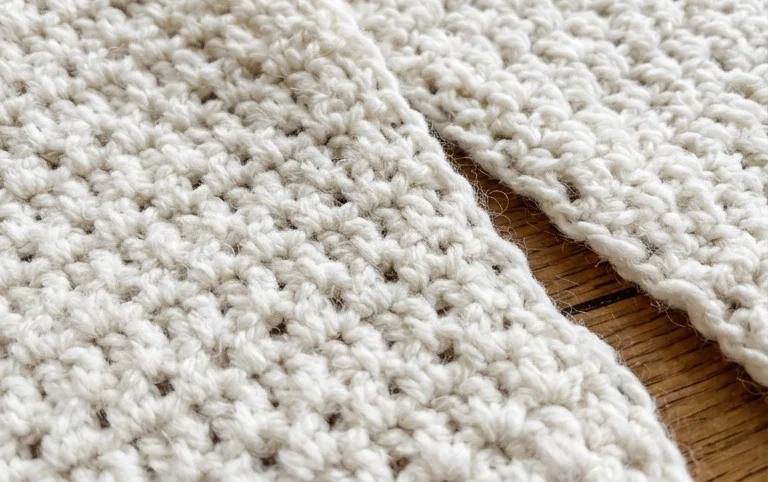
This cozy hooded scarf wraps you in soft, thick warmth, making it a reliable companion for windy afternoons and chilly nature walks. You will find that the dense fabric provides excellent coverage against the elements, while the hood stays securely in place without feeling bulky or restrictive. Beginners appreciate how quickly the panel grows using standard techniques, and those crafting gifts often return to this design for its practical, timeless appeal. By focusing on simple half double crochet stitches worked into the back loop, you create a beautiful ribbed texture that feels supple and looks polished with any autumn coat.
Why You’ll Love This Pattern
This classic crochet beanie provides a tight, warm fabric suitable for cold winter days, yet it works up quickly enough to complete in a single weekend. The construction relies on simple half double crochet stitches worked in the back loop, which creates a subtle ribbed texture that mimics knit fabric without the need for needles. Because it is worked as a flat rectangle and then seamed, the project is ideal for those who prefer to keep their stitch counts consistent without navigating complicated shaping or increases. You can easily adjust the height by adding more chains at the start or changing the circumference by adding rows, making it a highly adaptable staple for your wardrobe.
I finished this hat in one evening while watching a movie. The instructions were very clear and the ribbed look is much more professional than I expected for such a simple pattern.
— Sarah, casual crocheter
Pattern Overview & Skill Level
- Skill Level: Beginner
- Approximate Time: 3 to 4 hours
- Construction: Flat panel joined into a tube, then gathered at the top
- Finished Dimensions & Sizing: 20 inches circumference (stretches to 22 inches), 9 inches height (adjustable)
Materials & Supplies Needed
- Yarn: Worsted weight #4, 100% acrylic or wool blend, approximately 200 yards.
- Hook Size: 5.0 mm (H-8) crochet hook.
- Notions: Yarn needle for weaving ends and seaming, stitch markers to track row ends, scissors.
- Safe yarn substitutions: Cotton blends will result in a heavier, less stretchy hat, while alpaca blends will provide extra warmth and a softer drape. Avoid bulky weight yarns as they will make the fabric too stiff for a beanie.
Stitch Guide & Abbreviations (US Terms)
- ch: chain
- hdc: half double crochet
- BLO: back loop only. Insert hook only under the back loop of the stitch instead of both loops to create ribbing.
- st: stitch
- sl st: slip stitch
- YO: yarn over
Step-by-Step Pattern Instructions
Main Body Panel
- Row 1: Ch 40. Hdc in the third ch from hook and in each ch across. Turn. (38 sts)
- Row 2: Ch 2. Hdc in the BLO of each st across. Turn. (38 sts)
- Rows 3–60: Repeat Row 2 until the piece measures approximately 20 inches wide when slightly stretched.
Assembly and Finishing
- Seaming: Fold the rectangle in half so the short ends meet. Use a sl st to join the edges together through the BLO of the last row and the starting chain edge. Fasten off, leaving a 12-inch tail.
- Closing the Crown: Thread the long yarn tail onto your tapestry needle. Weave the needle in and out of the edge stitches along the top of the tube. Pull the yarn tail tight to cinch the top of the hat closed.
- Secure: Once the hole is closed, pass the needle through the center to the inside of the hat and tie a double knot to secure the closure. Trim any excess yarn.
Care & Washing Instructions
- Hand wash in cool water using a gentle wool-safe detergent to maintain the integrity of the fibers.
- Lay the hat flat on a clean towel to air dry; do not hang, as the weight of the water will stretch the fabric out of shape.
- Reshape the hat while damp if the ribbed texture feels flattened from washing.
Pro Tips & Common Mistakes to Avoid
Maintain consistent tension throughout your rows, as even small changes in tightness will cause the side edges of the rectangle to ripple. Use a stitch marker on the very first and last stitch of every row to ensure you are not accidentally dropping stitches, which is the most common reason for uneven hat edges. When joining the panel, avoid pulling the slip stitches too tightly, as this will create a visible, thick seam that might pinch your head when worn. If you want a slouchy fit rather than a fitted beanie, simply add 10 to 15 chains to your starting foundation row; note that this will require approximately 30 additional yards of yarn.
Frequently Asked Questions
Can I use a larger hook to make the hat faster?
Using a larger hook will increase the gauge and make the fabric much holey, which reduces warmth. Stick to a 5.0 mm hook for the best balance between speed and structural density.
Is this pattern suitable for complete beginners?
Yes, this is an excellent first project because it relies on the half double crochet stitch and requires no circular counting or complicated increases.
How do I adjust the size for a child?
To make the hat smaller, reduce the number of starting chains to 30 or 35. You can also work fewer total rows if the circumference of the head is smaller than 20 inches.
Can I sell the hats I make from this pattern?
You are welcome to sell the finished items you create using this pattern, provided you credit the original design. Mass production is not permitted.
Your new handmade hooded scarf provides the warmth needed for any winter outing while serving as a versatile accessory for your collection. You can customize the look by using a self-striping yarn to create shifting color patterns or by adding a thick pom-pom to the top for extra character. Please share a photo of your finished piece on social media to show how your specific color choice turned out. You will find plenty of other free patterns available on the main blog page for your next afternoon project.